A Worthwhile Mountain Project
Finally managed to accomplish the beginning of something worth writing about.
The project: about 5 years ago I bought a couple of relatively small lots of land at auction in the San Bernardino Mountains. One was $2,700 and one was $1,500. The more expensive one had large trees and paved road frontage, with power. The slope, however, is extreme. Almost impossibly so. The second lot is accessible through some very rough dirt roads which have gotten only rougher with the recent extreme weather over the last few years. This second lot, however, is at least on somewhat less of a slope. At this point, the lot is accessible with a four-wheel drive vehicle. Because of a recent slow-down of work, probably due to COVID-19, and also the happy accident that we purchased a Jeep which could access the more remote lot, it was a perfect time to start to do something worthwhile.
The original plan: a circular concrete slab supported by concrete posts, about 16′ in diameter, upon which we would construct a yurt, or perhaps simply a Souix-style tipi – or, even, a Mongolian style bell tent.
Why concrete? Two reasons:
1. Fire, the risk of which will probably only increase with time.
2. More difficult to destroy/steal/dismantle. Certainly not worth the trouble.
After a couple of days of progress, and speaking candidly with the resident hermit (a fascinating guy named only “Mohawk”), I am now leaning toward a wooden deck or at least some type of material that is far less lightweight than poured concrete slab. Mohawk’s opinion is that the locals would leave alone something that was fully constructed, particularly if I used a healthy amount of glue to fasten all members and used coated nails instead of screws, so disassembly would be much more trouble than was worth it. As for the fire – well, I’ll probably trade the risk fire against the reality of transporting over 140 x 60-pound bags of concrete up a 40-foot hill to the site, and also the fact that building a deck will take me about two days max, whereas a 16′ poured concrete slab, elevated would be a much more significant project. And after the two days of progress shown below, I frankly question whether I have it in me physically to accomplish such a task. And finally, it appears that most of my kids, unfortunately, have no interest in helping – which is mostly my fault for not raising them a certain way, I suppose. But I digress ….
The Progress:
The project started by loading up my father-in-law’s truck with some materials, such as 11 X 90-pound bags of Quikrete, 5 concrete deck pier-blocks, five 8″ tube forms, 5 X 40-pound bags of 3/4″ gravel, 120 feet of 3/8″ rebar, a concrete mixing pan, a bunch of tools and 4 X 5-gallon buckets of water (in case the nearby stream was dry.)
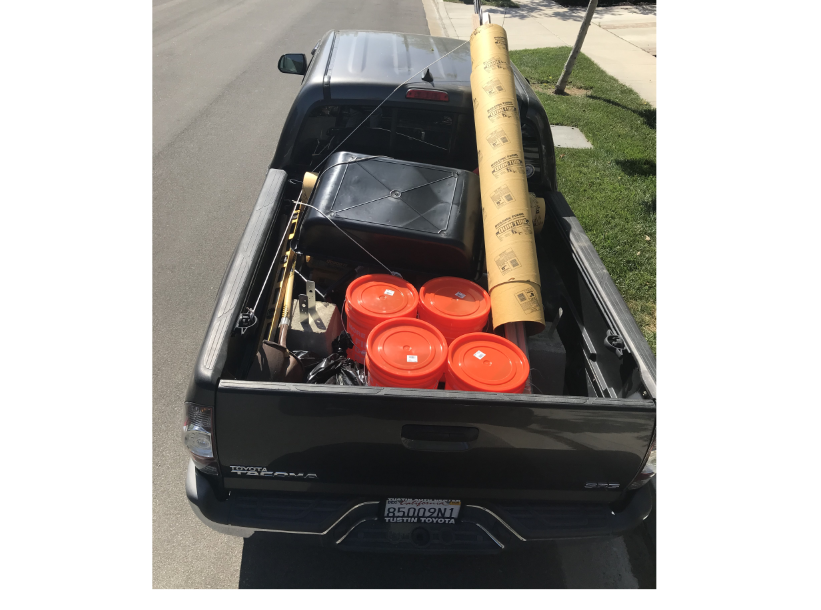
This actually proved to be way too heavy for the truck – with passengers, about 1700 pounds on a payload capacity of 1175. So I transferred about 600 pounds of material to the Jeep, and ended up with a two-vehicle caravan as shown below.
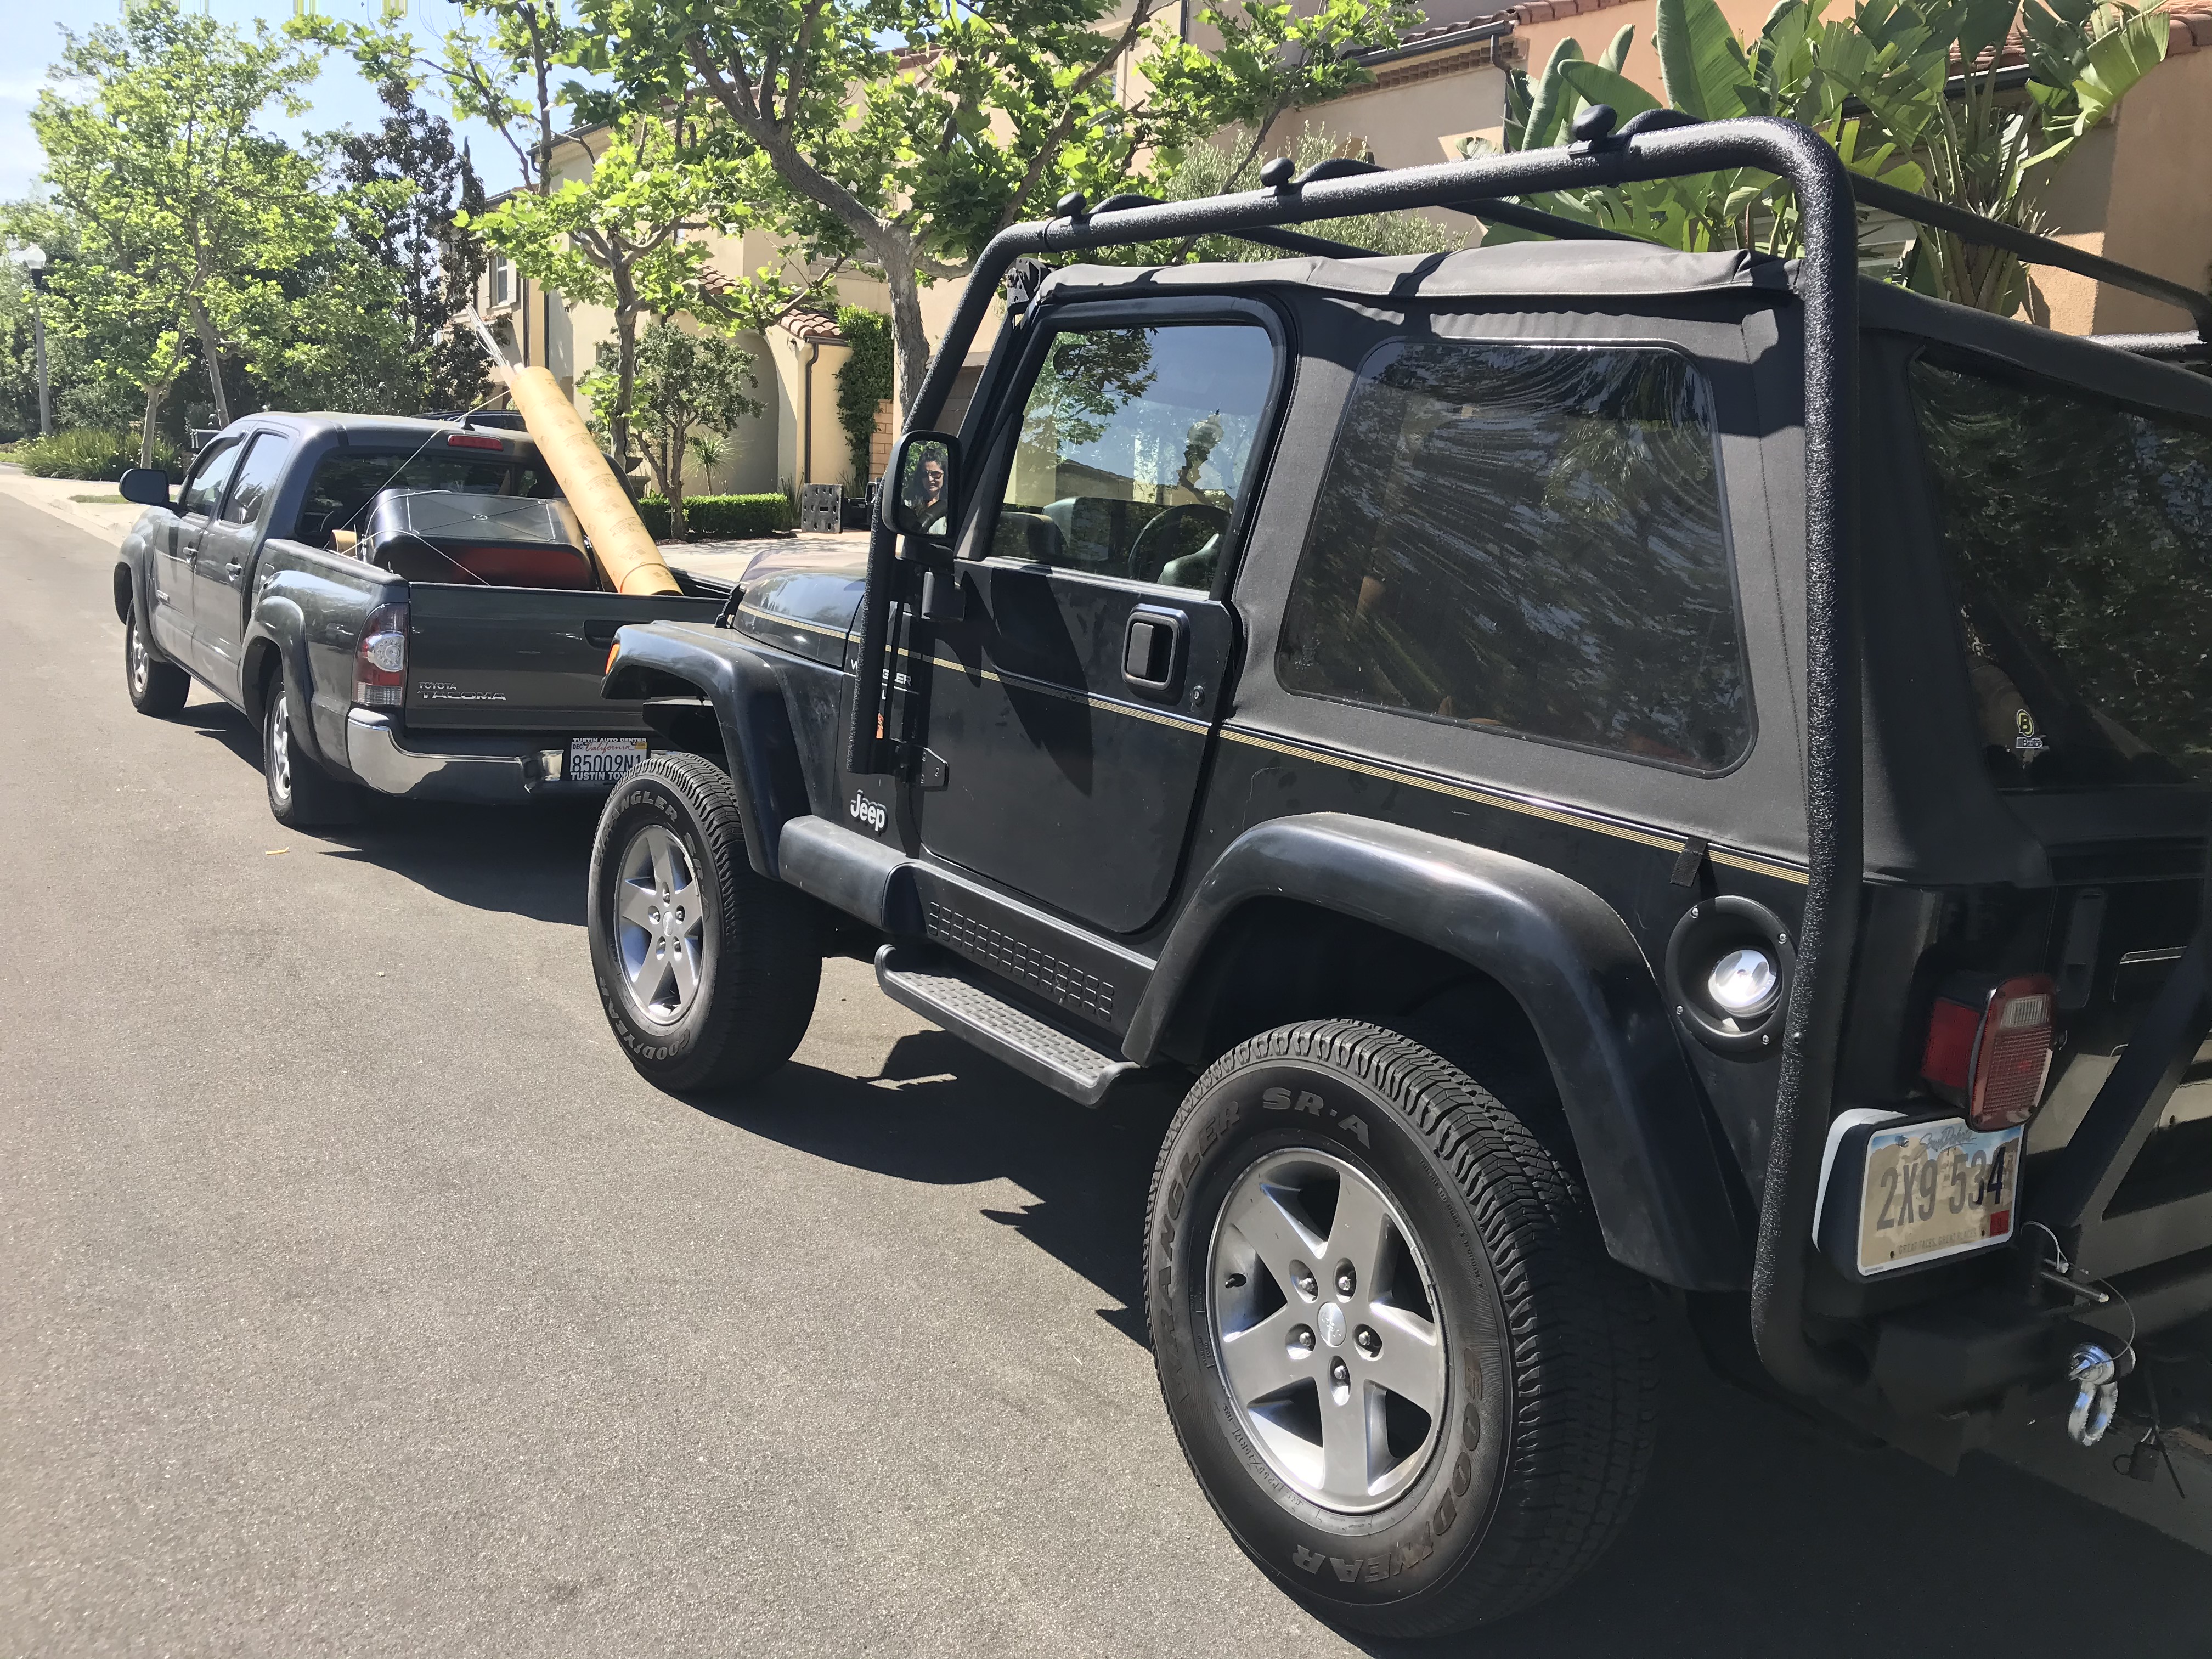
I pretty much fell in love with this Jeep over the weekend. In suburbia, it’s silly. In the mountains, it’s entirely appropriate and eminently useful.
Lisa and two kids (Sully and Ellany) would drive the truck, and would follow me in the Jeep, which was too maxed out for passengers. We would park the truck before the road became impossible for two-wheel drive vehicles, and then ferry the material through a series of trips to the site.
This worked out as planned, and it took the better part of the afternoon just to move the material from the truck to the site itself. After we took a quick spin on some mountains roads with the Jeep just for fun, they took the truck back home and I settled in for the work.
Phase 1A: Selecting the Site
There is a lovely small copse of young cedar trees on the southern border of the lot (which, by the way, is a suburban-size 50 X 80 ft heading straight up a grassy hill), and at first I thought I would set the deck among those trees, but after sampling the soil adjacent, which proved to be an excellent decomposed granite, and also considering the amount of work transplanting those cedars would be – I elected to plan the circular deck adjacent to the copse, as shown below.
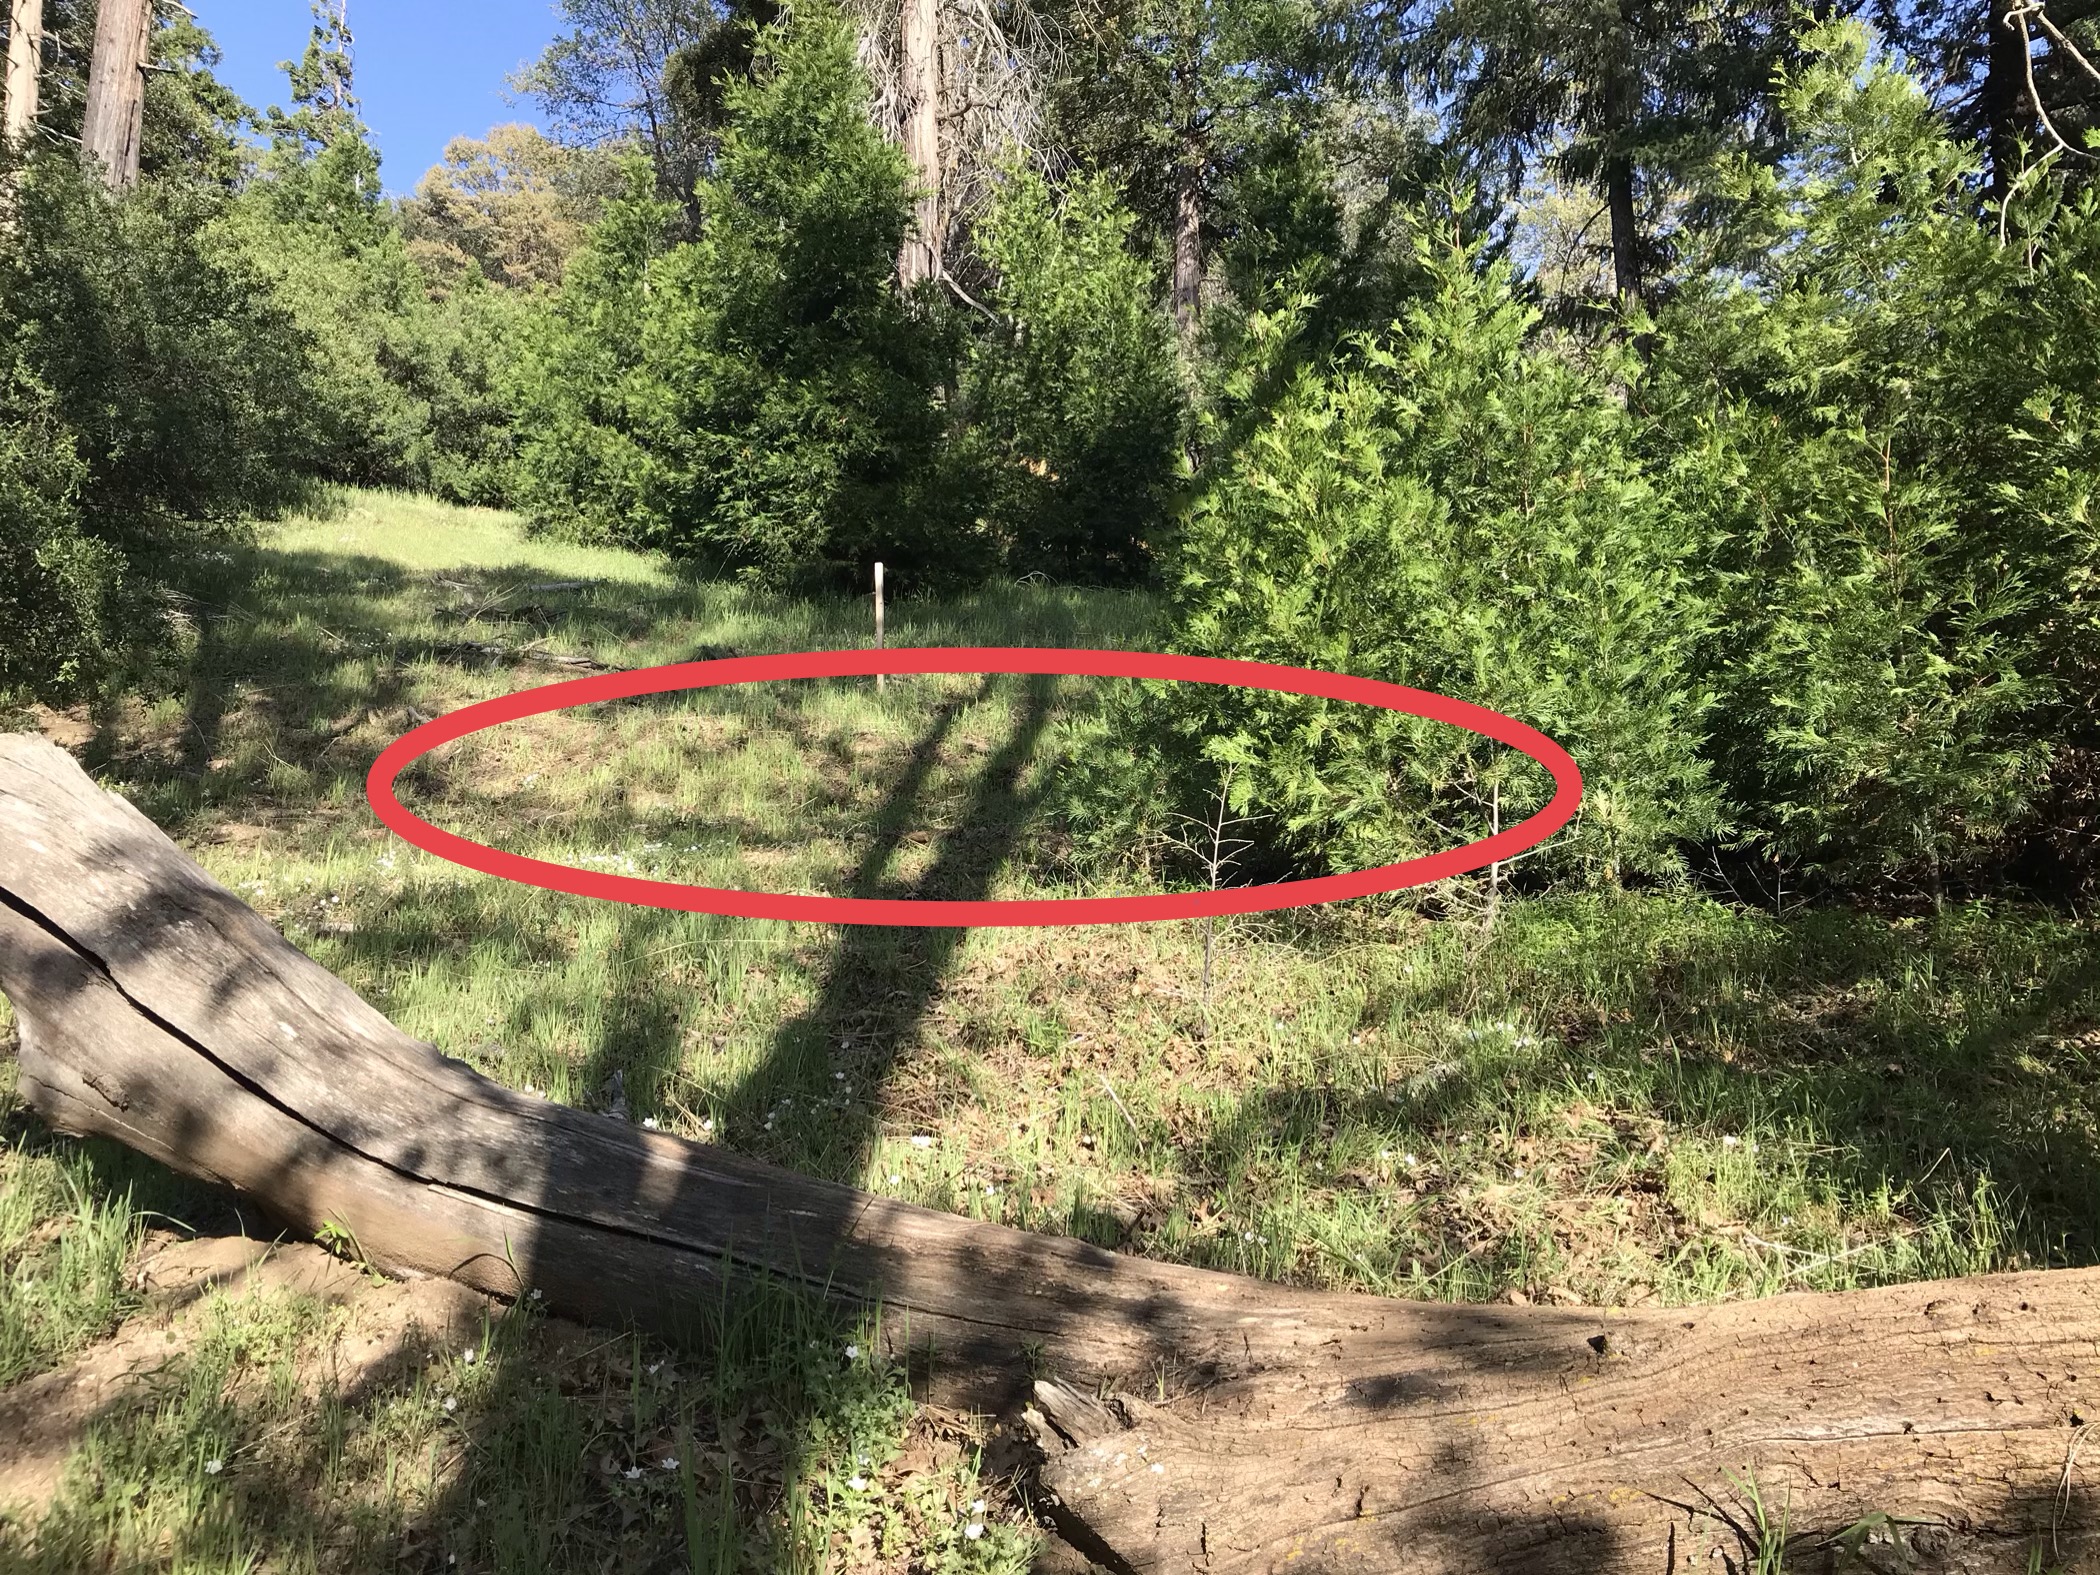
This is a plan for a supported circular deck on a fairly steep but not impossible slope.
Phase 1B: Digging the post holes:
I figured one 8″ pillar in the center of the circular deck, plus four more in each quadrant should support the load, whether I used concrete or wood. I first marked the deck using a center pole and walking in a measured circle with marking paint as shown below.
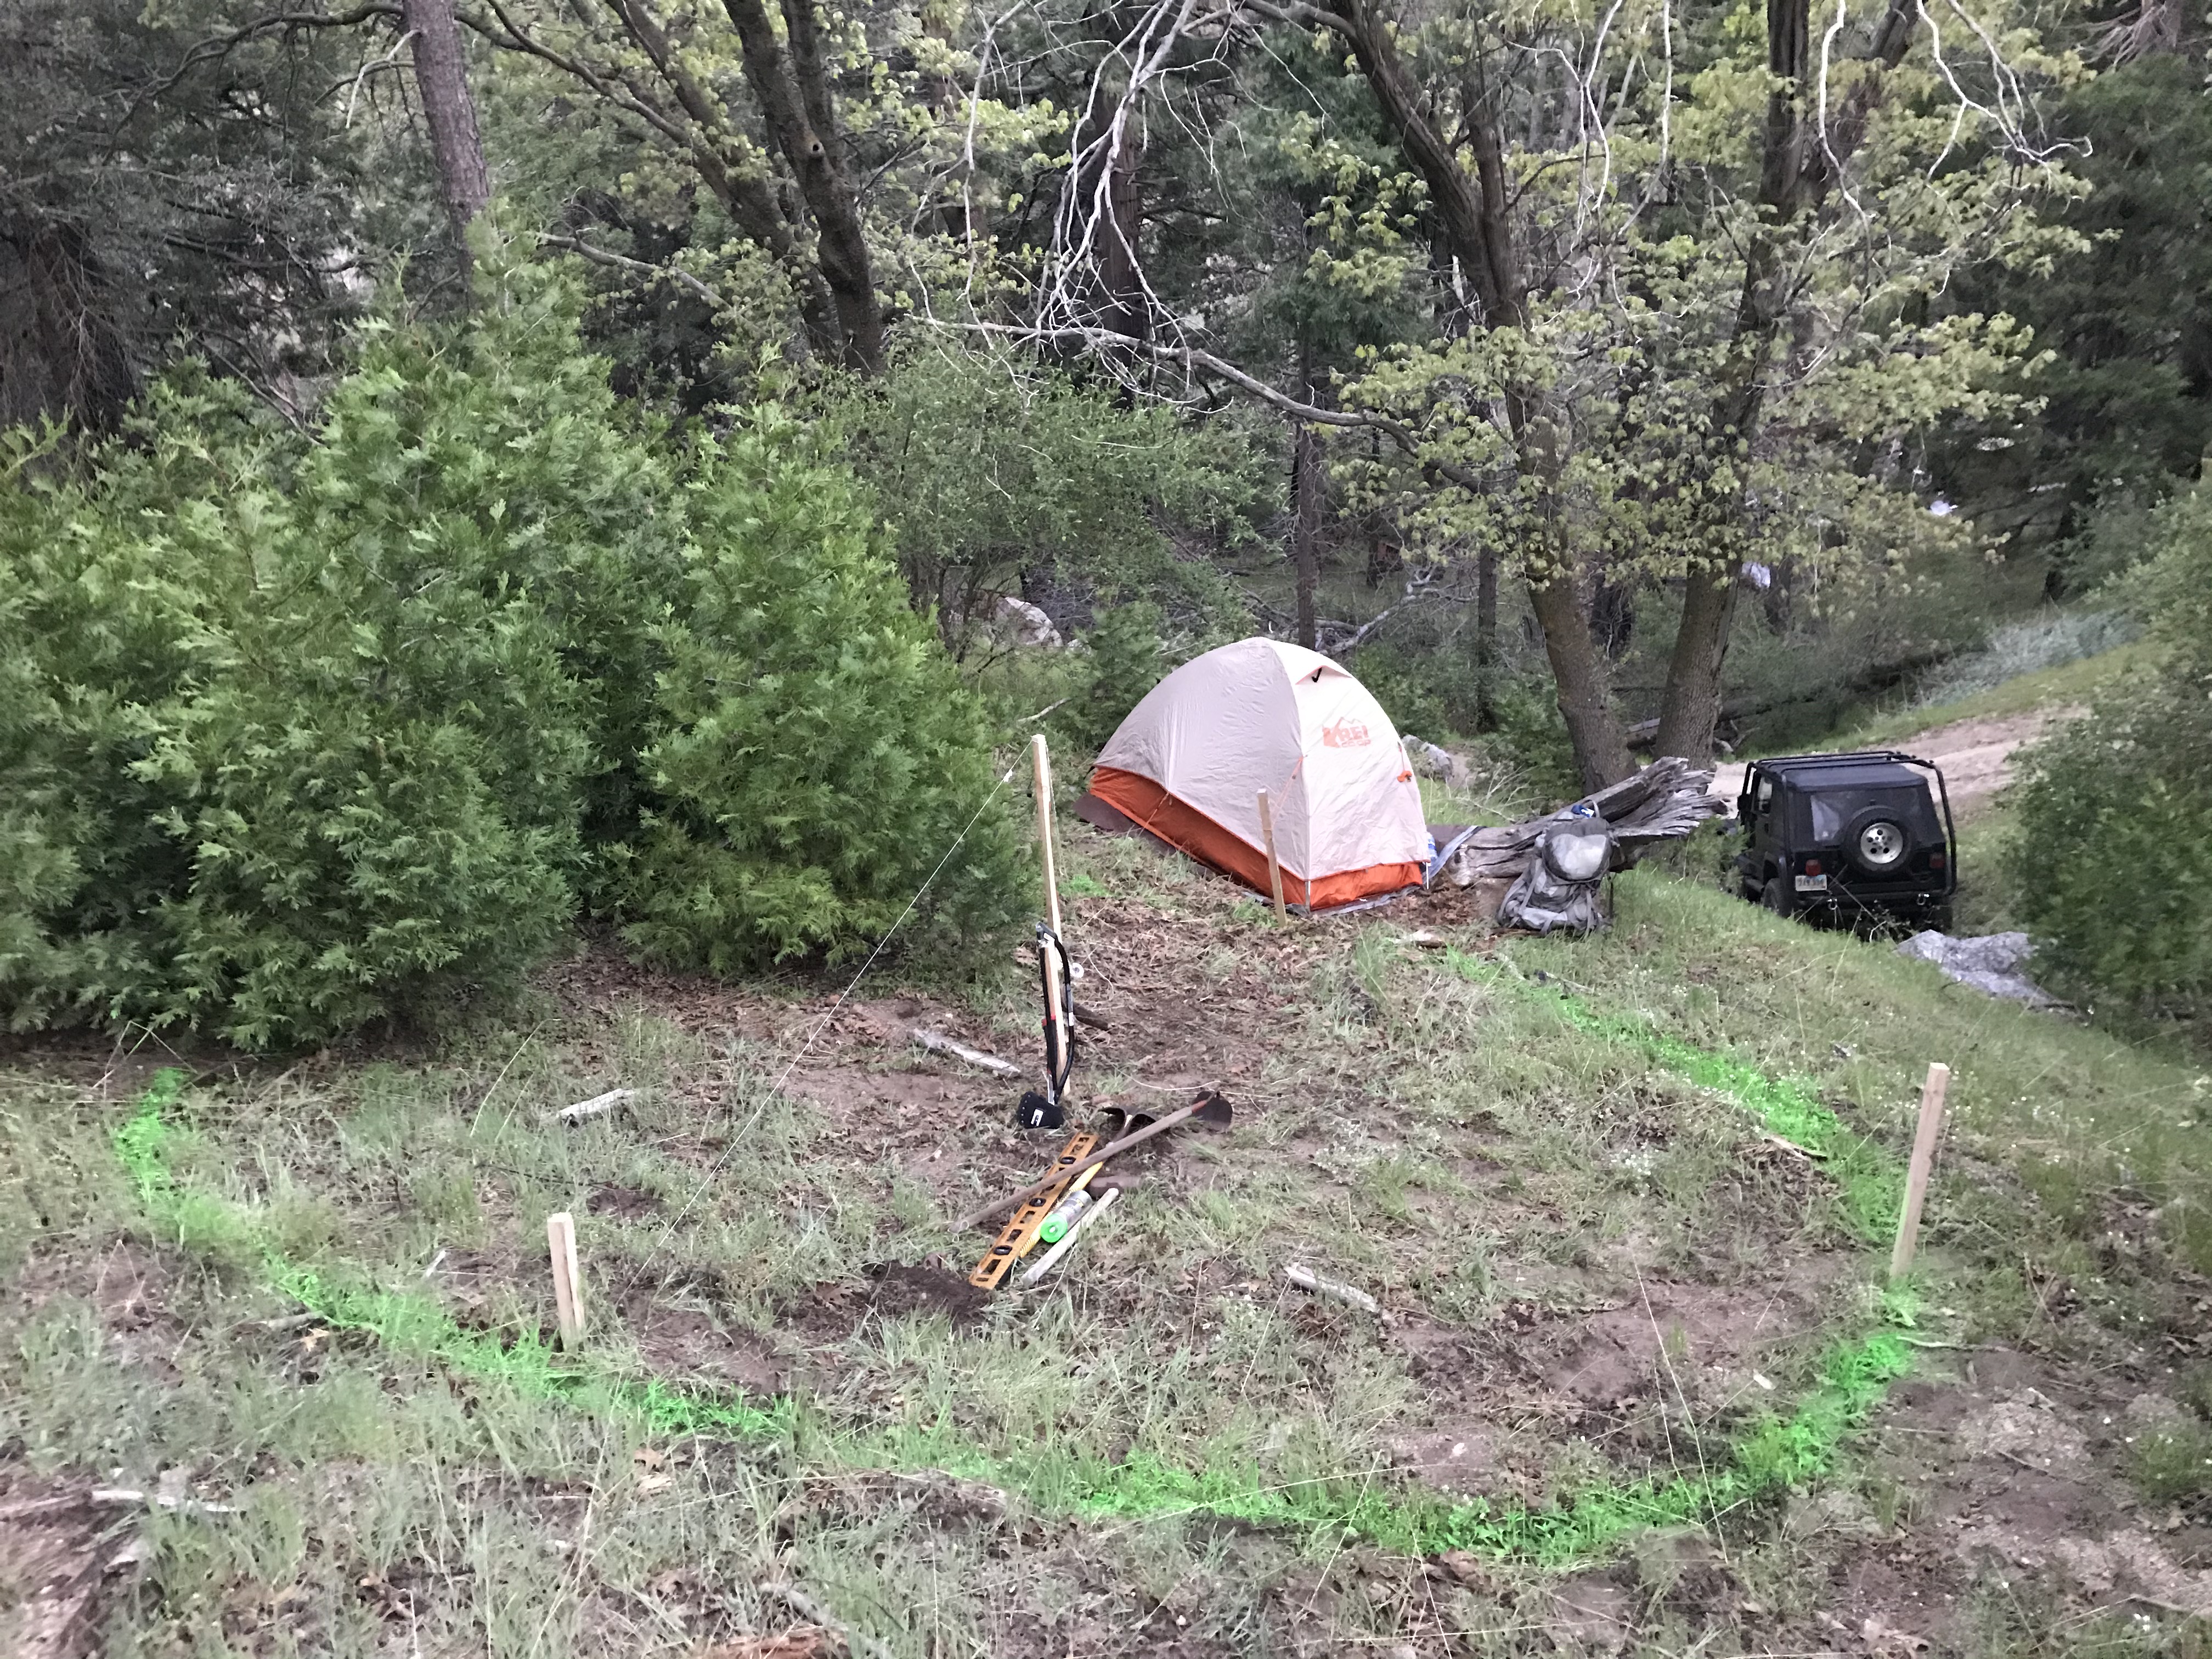
Here the diameter is marked. You can get a sense of how steep the slope is by comparing the tent to the jeep in the background.
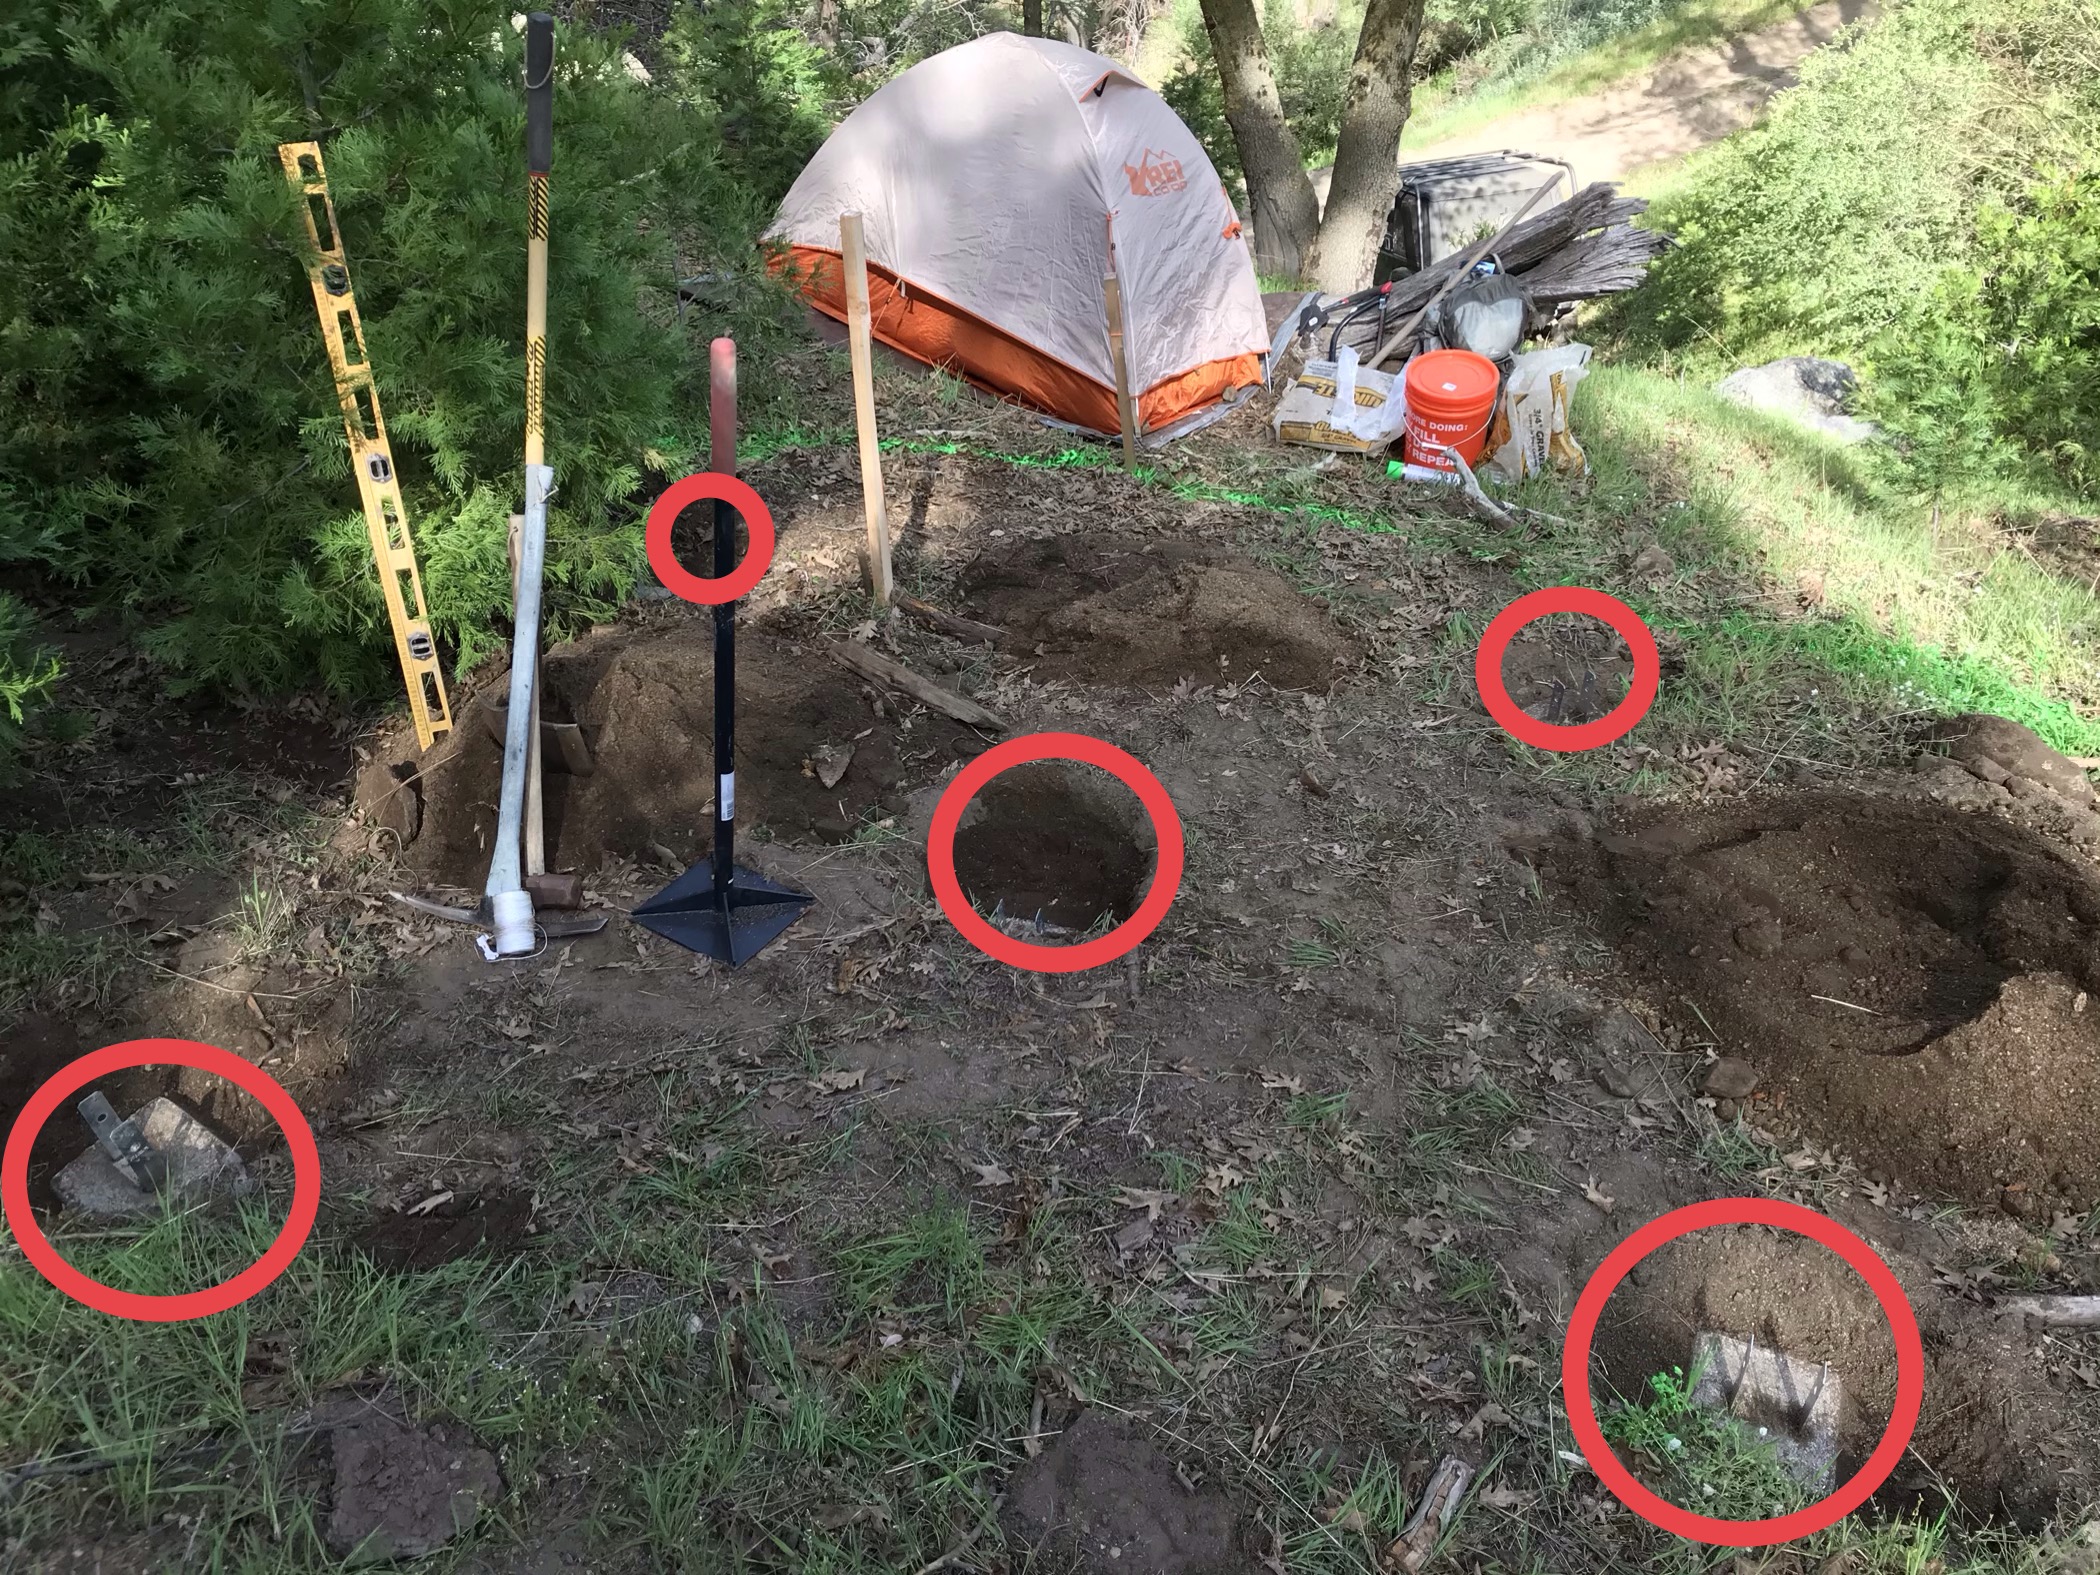
Here are the 5 post holes, marked where they were actually dug, and with the footing blocks placed.
Phase 1C: Setting the Pier Blocks
Each one of these post deck-pier blocks were set on 4-6″ of 3/4 inch gravel. Since they had steel tabs for 4″X4″ wooden posts, I decided to use those tabs to fit three 6-8 ft 3/8″ rebar pieces tied together with wire in order to at least reduce the possibility of sheer between the base of the tube and the block. (I know, the better design is one solid piece of poured concrete for footing and tube, but that would have been another 6 X 90-pound bags and I just didn’t have the capacity. I’ll do better in Phase 1G, as mentioned below.)
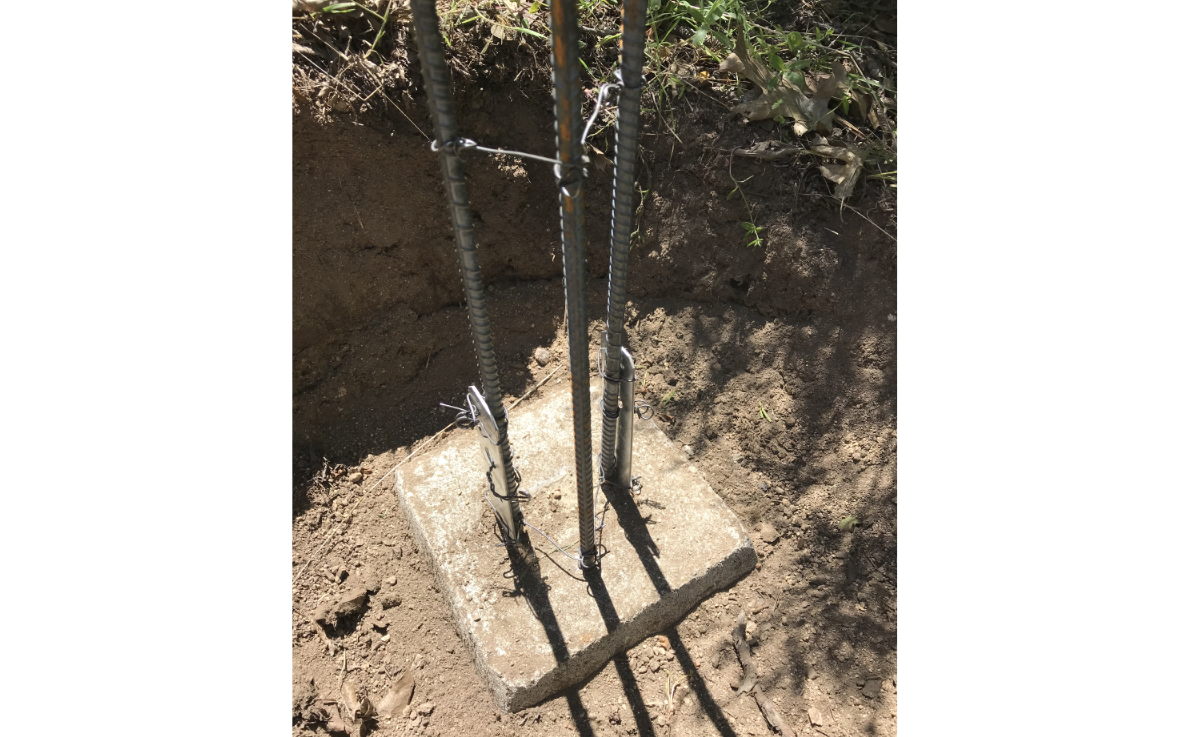
Three pieces of rebar fastened to the top of the Pier Block before sliding the tube onto the block.
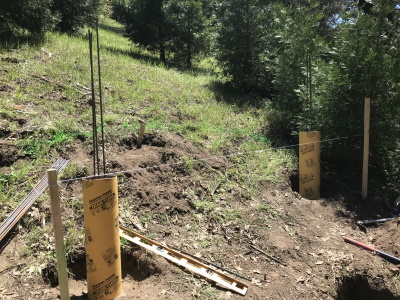
Phase 1D: Setting the Tubes and Ready to Mix
With two of the Pier Blocks sleeved and leveled carefully (this was actually more difficult than I imagined – using line levels and stakes across the entire diameter of the circle just didn’t match up and test out accurately enough with the piers. So I just decided to level each pier relative to each other as went along) I was ready to mix and pour the first two!
Two piers are leveled with each other and ready to be poured. The length of the rebar is in case I decide to actually use a concrete poured slab in which case the bars would be bent to 90 degrees and meet up with each other across the span of the piers.
Phase 1E: Hand Mixing the Concrete
This really brought back some great memories of the early 1980’s when I apprenticed myself with Michael Carroll who at the time was scraping a living as a stonemason and occasional assistant to his septuagenarian stepfather, a brick and block mason of about 50 years. Michael preferred working in stone, but even when we had those types of jobs we had to mix plenty of concrete and mortar, and often it was by hand. What a difference in mixing concrete at age 20 vs. almost 40 years later…
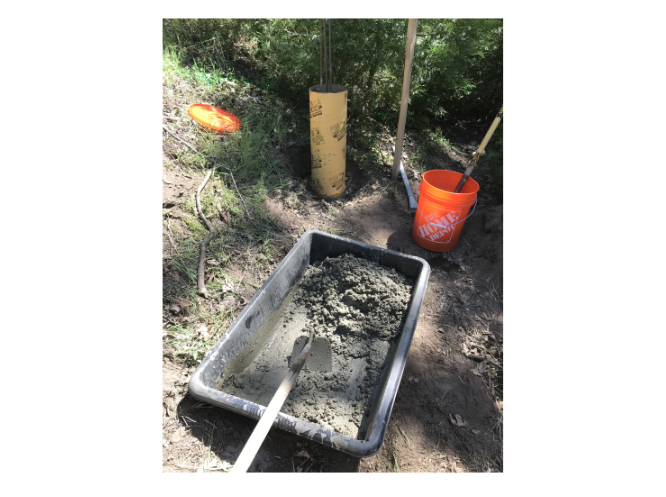
I’ll gratefully take any small amount of shade when mixing concrete by hand.
Phase 1F: Filling theTubes
The problem with mixing concrete is that there’s a time constraint. Sure, you can add some water to buy you some time, but you can only go so far with that. You have to mix the concrete in small enough batches, but you don’t want the concrete you have poured to solidify before you add another layer. This, of course, is far less of a concern with 8″ tubes, but in projecting the logistics onto the 16′ slab, it becomes daunting to even consider. First, the only way to do it would be to drag a mixer and generator up the hill. This would be then followed by 150 or so 60-pound bags of concrete – or perhaps sand, portland cement, and perlite for a lighter mix. Even so, the sheer logistics of it give me pause, to the say the least. I suppose bringing up three or four day laborers – the guys who hang out in the early mornings at the lumber yards across the street might work … but not so well with COVID-19 among us. Anyway …
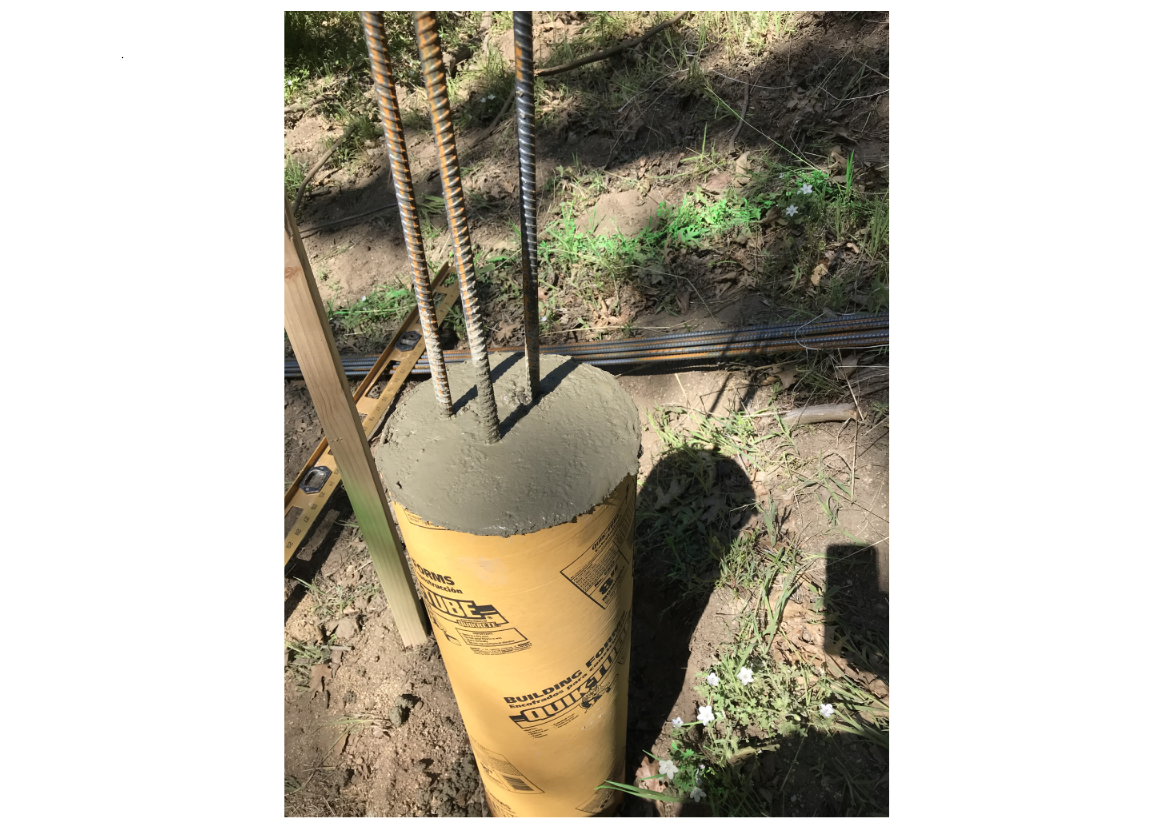
A completed pier.
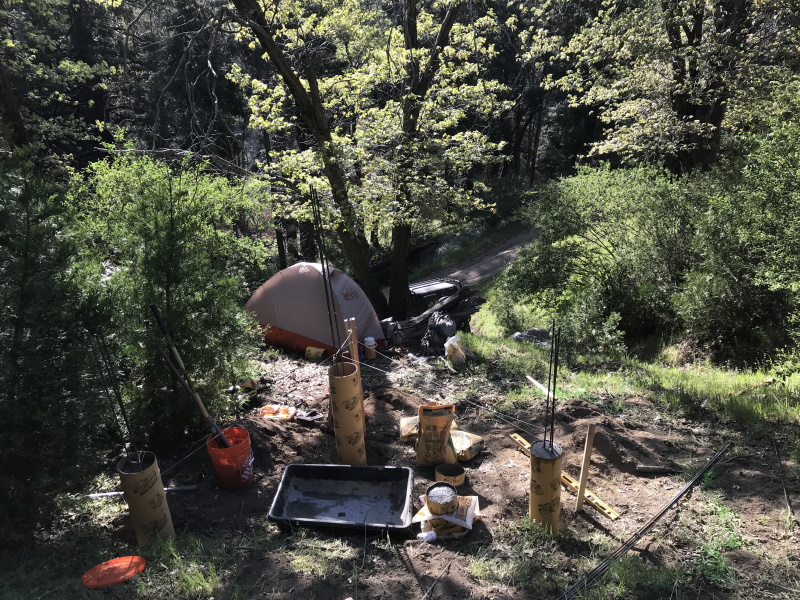
After about 14 hours of work with just a few short breaks, I managed to complete three of the five piers. On the advice of my son, Sully, I’m going to add two more outside the diameter of the deck to extend the deck for a place to sit outside the Yurt/Tipi/Bell Tent. This is especially attractive because there is a nice territorial view looking down the slope, across the road and toward the stream, which is close enough that you can hear the stream running at night when falling asleep.
The drawback is that an apparently obnoxious vagrant showed up to camp out near the stream, and stayed months, dragging in about eight truckloads of trash and strewing it all over the place. The resident hermit, Mohawk, says this is nothing new and he has made maybe 200 trips to the dump over the last 10 years. I offered to help clean it up. He says he is waiting to make sure the guy won’t come back. Anyway, once it’s cleaned up the view will be really nice.
This is where the project stands now (except all of the posts are done – it was dark by the time I finished and couldn’t take a photo) with a return planned for “Phase 1G” which is the completion of all of the posts. I will likely pour those posts all in one, instead of using the pier blocks.
Phase 2
So once all seven posts are completed, I will decide whether to attempt to pour a 16′ wide round concrete pad suspended on the posts, or just build a deck out of some wood/alternative material combination. Something tells me that it will be the latter.